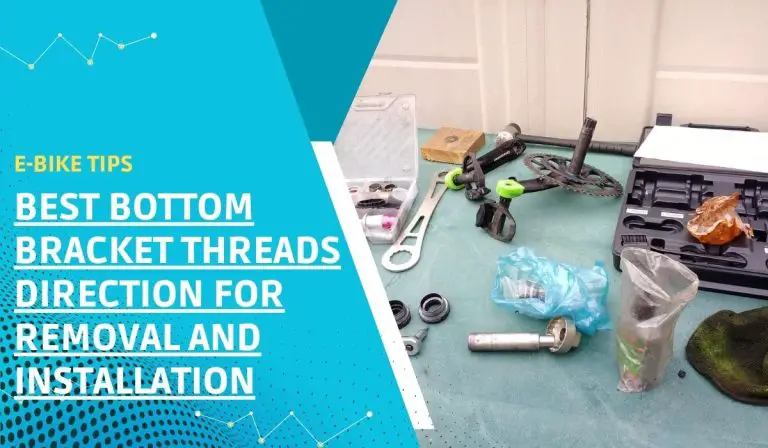
The common threading for bottom bracket shells is called “English.” If you want to thread your bike’s bottom bracket thread, the left-side cup tightens clockwise in a right-hand thread direction and removes counterclockwise. While the right-side thread is a left-hand thread, it tightens counterclockwise and loosens clockwise.
As a bike owner, nothing is more frustrating than your bike malfunctioning in unexpected places or at unexpected times, and you have neither the expertise nor the tools to fix the problem.
The bottom brackets are used to connect the crankset to the rest of your bicycle, which allows for fluid rotation. If your bottom brackets malfunction or are not appropriately threaded, you will be stuck with pedaling difficulties. Nobody enjoys riding a bike with a stiff pedal.
With a few simple tools, you can remove your bike’s bottom bracket thread in about thirty minutes. In this article, I will give you a step-by-step guide on removing and installing your bike’s bottom bracket threads, what tools you will need to do that, and an in-depth analysis of what thread direction to use on your BMX.
Skip To Section Here
- 1 Types of Bottom Brackets and How to Identify Them
- 2 How to remove threaded bottom brackets
- 3 How to install threaded bottom brackets
Types of Bottom Brackets and How to Identify Them
Here’s a step-by-step guide to help you identify the different types of bottom brackets:
Step 1: Remove the crankset (if necessary)
To inspect the bottom bracket, you may need to remove the crankset first. Use the appropriate tools to remove the crank arms and set them aside.
Step 2: Clean the area.
Before inspecting the bottom bracket, it’s a good idea to clean the area around it. Use a degreaser or a mild cleaner to remove any dirt and grime. This will make it easier to see the details of the bottom bracket.
Step 3: Examine the bottom bracket shell.
The bottom bracket shell is the part of the frame where the bottom bracket is housed. The shape and dimensions of the bottom bracket shell can help you identify the type of bottom bracket used.
Here are the most common types of bottom bracket shells:
Threaded Bottom Bracket (English or BSA):
This type has threads inside the shell, and the bottom bracket is screwed into it. It’s one of the most common types found on traditional road bikes and mountain bikes. It usually has a width of 68mm for road bikes and 73mm for mountain bikes.
Press-Fit Bottom Bracket:
This type doesn’t have threads. Instead, the bearings are pressed directly into the frame. Press-fit bottom brackets are commonly found on modern carbon fiber frames and some aluminum frames. They come in various standards, such as BB86, BB92, BB30, PF30, and BB386EVO.
T47 Bottom Bracket:
This is a threaded bottom bracket standard that offers larger and more durable bearings than traditional threaded brackets. It combines the benefits of threaded and press-fit designs. It has 47-mm-diameter cups and is suitable for various frame types.
Step 4: Measure the bottom bracket spindle.
The spindle is the axle that connects the two crank arms. Different bottom brackets have different spindle sizes and shapes. You can use a caliper or ruler to measure the diameter and length of the spindle.
Step 5: Check the bottom bracket markings.
Many bottom brackets have engraved markings or labels, indicating their type or compatibility. Look for any markings on the cups or the axle that provide clues about the bottom bracket type.
Step 6: Refer to the bike’s manual or manufacturer’s website.
If you’re unsure about the bottom bracket type or have difficulty identifying it, refer to the bike’s manual or visit the manufacturer’s website. They often provide detailed information about the components used on their bikes.
By following these steps, you should be able to identify the different types of bottom brackets and select the appropriate replacement parts or perform necessary maintenance on your bicycle.
How to remove threaded bottom brackets
Here’s a step-by-step guide to removing threaded bottom brackets on your bike:
Step 1: Remove the crankshaft.
Step 2: Identify the bottom bracket type.
Step 3: Unscrew with the appropriate tool.
See the table below to determine the tool type for the fitting design and diameter.
| TOOL FITTING | MAJOR DIAMETER | MINOR DIAMETER | TOOL |
| 3/4/6/8 external notches | 44–46 mm OD | 40 mm OD | HCW-5 |
| 8 external notches | 40–45 mm OD | 38 mm OD | BBT-18 |
| 12 external notches | 45–47 mm OD | 44 mm OD | BBT-79.3 |
| 12 external notches | 48–50 mm OD | 46.3 mm OD | BBT-35-12 |
- After finding the perfect tool, insert it and remove the crankset.
- Then you remove the shells.
- Then you loosen the bottom bracket.
- Then you clean the bottom bracket and shell threads.
How to install threaded bottom brackets
Here’s the step-by-step guide for installing a new threaded external cup bottom bracket:
Step 1: Gather Your Tools
Ensure you have the necessary tools: a bottle of grease and a bottom bracket installation tool.
Step 2: Clean the Bottom Bracket Shell threads.
Clean the threads inside the bottom bracket shell thoroughly. Ensure they are free from dirt, debris, and old grease.
Step 3: Apply Grease
Take high-quality grease and apply a thin layer to the cleaned threads inside the bottom bracket shell. The grease will provide a smooth fitting between the cups and the frame and prevent corrosion.
Step 4: Prepare Threaded Cups
Remember that the non-drive-side cup has a left-hand thread and the drive-side cup has a right-hand thread. Mixing them up could damage the threads and the bottom bracket. Be cautious and ensure you have the correct cup for each side.
Ensure to pay attention to the cups, as they’re labeled for the right and left sides:
Step 5: Hand-Tighten the cups.
With the cups started, continue screwing them into the bottom bracket shell by hand. Tighten them securely but not excessively. Ensure they are snug and aligned properly within the frame.
Step 6: Start Threading with a Spanner
Use a suitable spanner to thread the cups into the bottom bracket shell. Be gentle and make sure they thread smoothly without any cross-threading. This step helps align the cups correctly.
Step 7: Check for Smooth Rotation
After installing both cups, check that the bottom bracket spins smoothly without any roughness or binding. If you feel any resistance, double-check the alignment and threading of the cups.
Step 8: Reinstall the crankset
Once the bottom bracket is in place, you can reinstall the crankset. Use the appropriate tools to attach the crank arms securely.
Tools needed for the removal and installation of threaded bottom brackets
- A set of calipers
- Bottom bracket removal tool (specific to your bottom bracket type or brand)
- Crank removal tool (universal or specific to your crank type or brand)
- Allen key set
- Small flat screwdriver
- Rag
- Grease
- Bike Stand
- A spanner
Bottom bracket thread direction
Click on the link below to watch a tutorial on bottom bracket thread direction and which way to turn the threads to tighten and loosen them.
Troubleshooting and Tips
- The bottom brackets help bikers know when something is wrong with their pedal system by emitting signals like cranking, creaking, and other annoying noises and sounds.
- When this happens, do not ignore it; it is a sign that something needs to be changed or fixed.
- When your pedal starts clicking, it may mean that a movement against a crank occurs due to fitting a pedal without a washer.
- If a bottom bracket is especially hard to remove, it may be that the threads were not tapped before the initial install, even though factory specialists should have already cut the threads in the right proportions before sale. In some rare cases, there are oversights.
- In situations like this, you should clean the grease and any impurities out of the threads and re-tap the bottom bracket shell before you install it.
- For this purpose, you will need a tapping tool that threads into one or both sides simultaneously.
Safety considerations
- Slight variations in manufacturing tolerances can result in the occasional bearing cup or cartridge feeling very tight on the installation.
- Make sure when threading that you do not cross-thread or thread too tight to avoid stiffness in your bearing cup or cartridge.
- Put a tap into your bottom bracket threads before every reinstallation.
- For installation into new frames, ensure that the threads are cut perfectly, which helps ensure a smooth installation.
Conclusion
A bike’s pedaling should be silent, secure, and silky smooth. As much as I love riding a bike, I also want to ensure my safety, and I believe you do too.
When your bike pedals become noisy, stiff, or wobbly, it indicates that your bottom bracket replacement time is nigh.
This article covered the different types of bottom brackets when they are due for replacement, how to identify, remove, and install them, and what tools to use.
